Friday, November 16, 2012

The Turkey Chronicles: Roasted


Roasting is the most conventional of the turkey cooking methods and probably the easiest to screw up; I’ve eaten some really gnarly, dried-out turkey in my day. Nothing’s worse than a slab of desert dry, tough-as-nails breast meat; no amount of gravy can do it justice. To remedy the problem, pre-salt the bird, inside and out, to increase the moisture-holding properties of the cells in the meat, making it juicier after it’s cooked (a similar but more effective principal as brining). Take a cue from our Asian pals and adopt the method of air-drying the carcass to tighten the skin, so that it separates from the meat and gets crispy and golden brown when roasting.
 Start the cooking process with a bird that isn’t ice cold, straight out of the refrigerator. Don’t stuff it, so that the meat cooks evenly inside and out; cook your stuffing in a casserole (much more control and much safer). Check the temperature using a digital thermometer and remove the bird at the right temperature, keeping in mind that most ovens are not properly calibrated. Lastly, let it rest before slicing, so that the proteins cool and stabilize, and the juices are retained inside the meat.

FAQS:

Purchase 1 to 1½ pounds of uncooked whole turkey per person. For every pound of bird purchased, expect slightly less than a half pound of cooked meat yield. For a large group, the turkey will taste better and be juicier if you cook two smaller birds instead of one large bird. When thawing a frozen bird, allow 24 hours of refrigerated thawing every 4 to 5 pounds, and do not include the roasting day in your calculations. At 350°F, figure 13 minutes cooking time per pound. If any part of the turkey is getting too dark in the roasting process, cover it with foil to prevent additional browning. Take the bird out at 160 to 165°F, keeping in mind that it will continue to cook after removal from the oven. Measure the temperature by inserting a digital thermometer into the thickest part of the thigh and the breast, making sure you don’t hit any bone (which will read hotter than flesh). Pierce the thickest part of the thigh with the tip of a sharp knife: the juices should run clear with just a slight trace of pink.

12-14 # turkey, fresh if possible, giblets removed, rinsed and dried

2 Tbl Kosher salt
2 tsp medium grind black pepper
1½ to 2 cups of turkey or poultry stock

Rub the carcass inside and out with a mixture of the salt and pepper. Place it on a rack inside a pan and let it air-dry, uncovered, in the refrigerator for 24 to 48 hours. Bring it out of the refrigerator a couple of hours before you plan on cooking it. Preheat the oven to 450°F. Tie the ankles of the drumsticks together with twine and tuck the ends of the wingtips underneath the shoulders (this is called “akimbo”, oddly enough). Place the turkey on a rack inside a roasting pan large enough to allow basting access. If the sides of the pan are too high, it can prevent even browning.


Pour the turkey stock into the bottom of the roasting pan and place the pan on the lowest shelf of the oven, lowering the temperature to 350°F after you shut the door. Total cooking time will be 2½ to 3 hours, depending on the oven and how often you baste. The pan should be rotated 180 degrees halfway through the cooking process, at about an hour and a quarter into the process, to ensure even cooking. Baste the bird liberally with pan drippings every 30 minutes.


You will smell the turkey when it is getting done, but start checking for doneness a little before you expect it to be finished. Pierce the flesh and look for clear juices with a trace of pink, and use the instant-read thermometer to confirm a 160-165°F internal temperature. Remove the bird from the oven, tilt the bird to get all of the cavity juices into the bottom of the roasting pan. Place the turkey on a carving board and tent it loosely with foil for 20 to 30 minutes, while the gravy is being finished (see previous blogpost on making stock and gravy).

http://gustidude.blogspot.com/2012/11/the-turkey-chronicles-stock-and-gravy.html

Carving:

Dark meat:
Use a very sharp knife so that you get clean cuts, and a carving fork so you don't burn your hand. Place the turkey with the legs facing away from you. Cut the skin that connects the leg to the body, cutting as close to the leg as possible. Using the hand or a towel, push down on the leg until the thigh joint pops out of socket, cutting through that socket joint to separate the leg quarter from the body.  Lay the thigh quarter flat on the board, locate the joint between the thigh bone and the drumstick, and cut down through that joint, separating the thigh from the drumstick. Repeat with the other side. Holding the drumstick vertically by the ankle, cut next to the bone in thick slices, around the drumstick. Bias-cut (cutting against the grain of the muscle) those slices into serving-sized pieces. Lay the thigh skin-side down and fillet the thigh bone from the meat. Turn it over and bias-cut the thigh into serving sized pieces.

White meat:

Remove the wings by cutting through the ball joint on each side. Portion the wings by cutting through the two remaining wing joints. Making a slice along one side of the breastbone, and stabilizing the carcass with the fork on the side opposite the cut, start slicing down against the frame towards the wing ball socket, pushing the entire side of the breast away as you cut down. Make a final cut along the base of that breast section to remove the breast from the carcass. Place that side of the breast skin-side up on the board and bias-cut the breast into serving-sized pieces.  Repeat with the other breast.  Arrange the dark meat and white meat on a platter and serve.

Brining Basics:

Many folks associate brining with turkey roasting and it does make for a juicier turkey, because the salt relaxes the muscle fibers, making them able to absorb moisture. One problem with brining is that it definitely makes the meat juicier, but it dilutes the flavor of the bird (while salting does not). Never brine a Kosher or self-basting turkey, they have already been salted. Always use Kosher salt, not iodized salt.
1 cup coarse Kosher salt
1 cup sugar
2 gallons of cool water
12-14 # turkey
Whisk salt and sugar into water until completely dissolved. Place the turkey in a thick plastic bag, and the bag inside a plastic container that will contain any possible leaks. Pour the brining solution over the turkey inside the bag and make sure it reaches all portions of the carcass. Seal the bag and refrigerate 8 to 14 hours. Drain thoroughly, rinse with cool water, drain, and pat dry before roasting. You can add any seasonings or herbs you prefer to the brining solution.


Mick Vann ©  

Thursday, November 15, 2012

The Turkey Chronicles: Spatchcocked and Grilled


photo by John Anderson; a spatchcocked turkey hits the grill....

…from my article in
The Austin Chronicle, Nov 17, 2006

While cruising Aw Taw Kaw market in Bangkok on my first trip to Thailand some years ago, I was fascinated by the Thai method of dealing with poultry. If it's not spinning lazily on a jury-rigged rotisserie, then it's butterflied and marinated, stretched flat on a green bamboo frame, and grilled over coals. I wondered why that same process couldn't be done with a turkey, minus the bamboo frame, of course. After all, what could be better for a bird than the succulent kiss of flames?

Those Thai birds were spatchcocked, a British butchery term that came into use in the 1700’s, referring to the removal of the backbone of a bird so that it can be flattened prior to grilling over coals. Capt. F. Grose, in his 1785 Dictionary of the Vulgar Tongue, describes the term thusly: ”Spatch cock, abbreviation of a dispatch cock, an Irish dish upon any sudden occasion. It is a hen just killed from the roost, or yard, and immediately skinned, split, and broiled.” 

Once I grilled the first prototype, it occurred to me that the dynamics of the process cause all portions of the bird to cook evenly. Instead of a huge breast towering above the rest of the turkey, with that portion being the leanest (and driest) part of the bird, it is now safely protected by the much fattier thighs and wings on the outside and is on the same level as the rest of the carcass. It is a form that marries well with marinating, a flat rectangle being much easier to marinate than a large football-shaped object. Trying to determine the estimated cooking time was a crapshoot: I had no clue as to how long it would take but knew that it would be considerably shorter than roasting in an oven.
With that first 12-lb. bird sizzling comfortably on a friend's grill, we began to scientifically test the temperature with an instant-read thermometer every 15 minutes, looking for that magical 150°F reading (the bird will continue to cook slightly as it rests for the required 20 minutes before slicing). The first one we grilled turned out to be perfectly done in one hour and 10 minutes. The next one took five minutes longer, but the grill was funkier and less controllable. The third one took one hour and 15 minutes. Our 14-pounder, which had a thicker breast, took one hour and 25 minutes. A cooking-timing standard had been established.

The Feds recommend a temperature of 185°F to be completely safe. This also guarantees a bird devoid of any moisture, which ensures radically increased gravy consumption out of sheer culinary self-defense. At 145°F, the juices from the thickest part of the thigh will run clear (i.e., not pink) when pierced, which used to be the doneness standard before the advent of digital thermometers. I've found that an internal temperature of 150°F will insure a tender, moist bird with no trace of pinkness.

This method of turkey cooking is loaded with advantages.
Time: Grilling a spatchcocked turkey is the fastest way to cook the bird. Frying only takes three minutes per pound, but it requires about an hour just to get the oil hot enough to cook the thing. Conventional roasting can take as long as four hours, and smoking a turkey will gobble up eight to 12 hours.

Space: Thanksgiving is all about the oven. So much successive baking – pies, cakes, cookies, and oodles of casseroles – is done in ovens that can be stretched to their limits by a large cookie sheet of Tater Tots. Everyone has to compete for valuable oven real estate, and having a huge turkey in there just compounds the problem. Usually the top rack has to be removed to get the bird in the oven, so all other baking chores grind to a halt for the next 2½ to 3 hours. Consider also that it's usually in the 80’s around Thanksgiving in Central Texas, so having the oven on while cooking a bird for hours can really heat up the house. 

Safety: Roasting a stuffed turkey with a cavity full of raw dressing can allow the stuffing and the surrounding meat to sit at the microbial danger zone for too long, and it further increases the cooking time by an hour or so. Consider the Cajun alternative of a huge 60-quart vat of boiling oil with a flammable gas fire roaring underneath it, and you begin to wonder why even more houses aren't burned to the ground every Turkey Day and why more third-degree grease burns aren't reported at hospital ER's all over the South. (Not to mention the problem of dealing with 4 to 5-gallons of contaminated frying oil the next day; it's no surprise that city sewage clogs spike the day after Thanksgiving as thousands of gallons of grease congeal in sewer lines like so many arterial blockages.) Even worse, once it's fried, the turkey's skin and wings are black and inedible.

Social: Normally, the menfolk are huddled around the TV, beers in hands, watching successions of pregames, games, or postgames, while they ignore their families and get wasted. Fewer people in the kitchen are needed, not more, and fewer sloths lounging about underfoot would be a relief for that congestion. What could be better than a herd of guys in their natural element, hovering over a grill and a bed of coals, watching a big, flat bird slowly turning golden-brown. The grilled turkey frees up oven space, eliminates the danger of nasty bacterial growth and boiling oil, and the guys are outside, actively involved in the cooking and not underfoot.

Taste: Every person I've spoken with who has eaten the now-famous grilled spatchcocked turkey has said that it is the juiciest and most flavorful turkey they have eaten. I heartily agree. All birds should be cooked this way.

Here's how to do it:

You want a thawed 12- to 14-lb. turkey, with the wing tips and the backbone removed. You can always get your butcher to take the backbone out, or use a hefty pair of poultry shears, a thick-bladed knife, a bone saw, or a clean Sawzall. Once it's spatchcocked, press it as flat as you can: the flatter the better. It will resemble a large rectangle and will fit into a trash bag for storing until grilling time. Store it skin-side down so that the cut ribs don't pierce the plastic bag.

At this point, you can marinate or brine the bird, pre-salt it, or apply a spice rub. A simple garlicky vinaigrette with herbs such as parsley, marjoram, chervil, thyme, or a bit or tarragon or sage works nicely, as does a bottle of doctored-up zesty Italian salad dressing, for that matter. If you use a rub, use one that has little sugar in it because the sugar will caramelize too darkly on the grill. I've used marinades, rubs, and nothing but salt and pepper, and all three versions are excellent. If you expect a crowd, cooking two small turkeys will work out better than one large one.

Preheat your covered grill to medium-low; you will cook the turkey covered, so it gets some smoke with its grill. You'll need two sets of long-handled tongs to flip this bad boy, which you will do every 15 minutes during the cooking process. Have a cooking thermometer handy so that you can start checking the internal temperature after about an hour and 10 minutes. You want to insert the thermometer probe into the thickest part of the thigh and the breast, without hitting any bone, for an accurate reading. Once it's at 150°F, take it inside, cover it loosely with a piece of foil, and let it rest for 20 or 30 minutes before you start carving; it will stay plenty warm. Total elapsed grilling time: one hour and 15 minutes, give or take.

Mick Vann ©

The Turkey Chronicles: Stock and Gravy


Turkey Gravy: The Do-Ahead Part of the Meal

When Thanksgiving rolls around, every square inch of any kitchen surface is packed with stuff, including every burner on the stove, often with pots too big to fit. Making the stock for the gravy a few days early gets a big stock pot out of the way, and gets one of the foundations of the dinner prepped early and put to bed.

A heavy roasting pan
5-6 # of turkey parts, chopped into 3-4 inch portions (necks, wings, legs)
1 large head of garlic, sliced in half horizontally
1 large onion, quartered
1 large carrot, chopped
2 ribs celery, chopped
2 bay leaves
1 tsp black peppercorns
1 tsp salt
1 tsp poultry seasoning mix (see note, below)
2 # duck or other poultry feet (optional)
4 Tbl fat
1/3 cup flour

Lightly oil the pan, fit the poultry parts into the pan, then roast at 450°F for 1 hour, or until nicely browned; halfway through, turn the parts over to roast the other side. Place the roasted parts (and the duck feet, if using) into a 5-quart pot. Add 2 cups of hot water to the roasting pan, place over two burners, and bring to a boil. Use a wooden spatula or spoon to scrape all of the browned bits off of the bottom of the roasting pan. Pour the water and browned bits into the pot and add enough warm water to cover the parts. Bring to just below a boil and cook 20 to 30 minutes, removing any scum that rises to the top of the pot. Add the garlic, onion, carrot, celery, bay, peppercorns, salt, and poultry seasoning and simmer over low heat 3 hours.

Ladle off and reserve any fat at the surface of the pot. Place a fine sieve (or a colander lined with a double layer of cheesecloth) over a container large enough to hold the stock and strain the stock, reserving the necks and making a sandwich from the meat of any wings or legs. Press gently on the vegetables to extract most of the liquid. Let the stock cool to room temperature and ladle off any fat that rises to the surface, reserving the fat for sautéing side dishes or for making the gravy roux. Refrigerate for up to 4 days, or freeze up to 6 months; about 1½ cups of the stock will be added to the bottom of the roasting pan when cooking the turkey.

The gravy will be made using the juices and browned bits from the bottom of the turkey's roasting pan, de-glazed with about a cup of dry white wine, reduced, and then combined with the re-heated stock made previously. Once that mixed liquid of roasting juices and wine has cooked down in half by volume, and all the browned bits are scraped off of the bottom of the roasting pan, transfer it to a container and ladle off and reserve any fat. Add the de-fatted reduced liquid to the reserved re-heated stock.

You'll need about 4 tablespoons of hot fat with about 1/3 cup of flour whisked into the fat over low heat to make the roux; any remaining fat can be used to sauté, or any extra fat that is needed for the roux can be substituted with butter. When the roux is just starting to turn a light tan, slowly whisk in 4 cups of hot turkey stock to make the gravy.  If you are making giblet gravy you can add the minced meat from the reserved necks, the de-gristled gizzard, and the heart to the stock, simmering it over low heat, covered,for about 45 minutes before adding the roux. Some folks also like to add some chopped hard-boiled egg to the gravy. Season the gravy to taste with salt and pepper and keep warm until service.

Note: Duck, chicken, or goose feet are loaded with collagen and flavor and will add greatly to the richness of any poultry stock (and make a great snack to nibble on later on). They can be purchased at most Asian markets and at some specialty butcher shops or market vendors. In Austin they can be found at MT Market, inside the large Asian shopping mall at the intersection of Kramer and North Lamar.

To make your own poultry seasoning:
3 parts sage
3 parts marjoram
3 part savory
3 parts parsley
2 parts thyme
1 part rosemary
Pinch nutmeg

Mick Vann ©


Thursday, November 8, 2012

Election Night at Rancho Winslow

When the concierge of Rancho Winslow called, some fellow who refers to himself as "C-Boy", I reserved a clothes washing machine to be ready around 4:30 ish, for the election night gathering at the estate. I would be ensconced in the east suite, at the corner of the east wing. We convened and tuned to MSNBC to watch the poll results come in. There was tequila and tacos, to show our solidarity with the Latino voting bock that we hoped would help propel our candidate to victory.


Taco toppings....


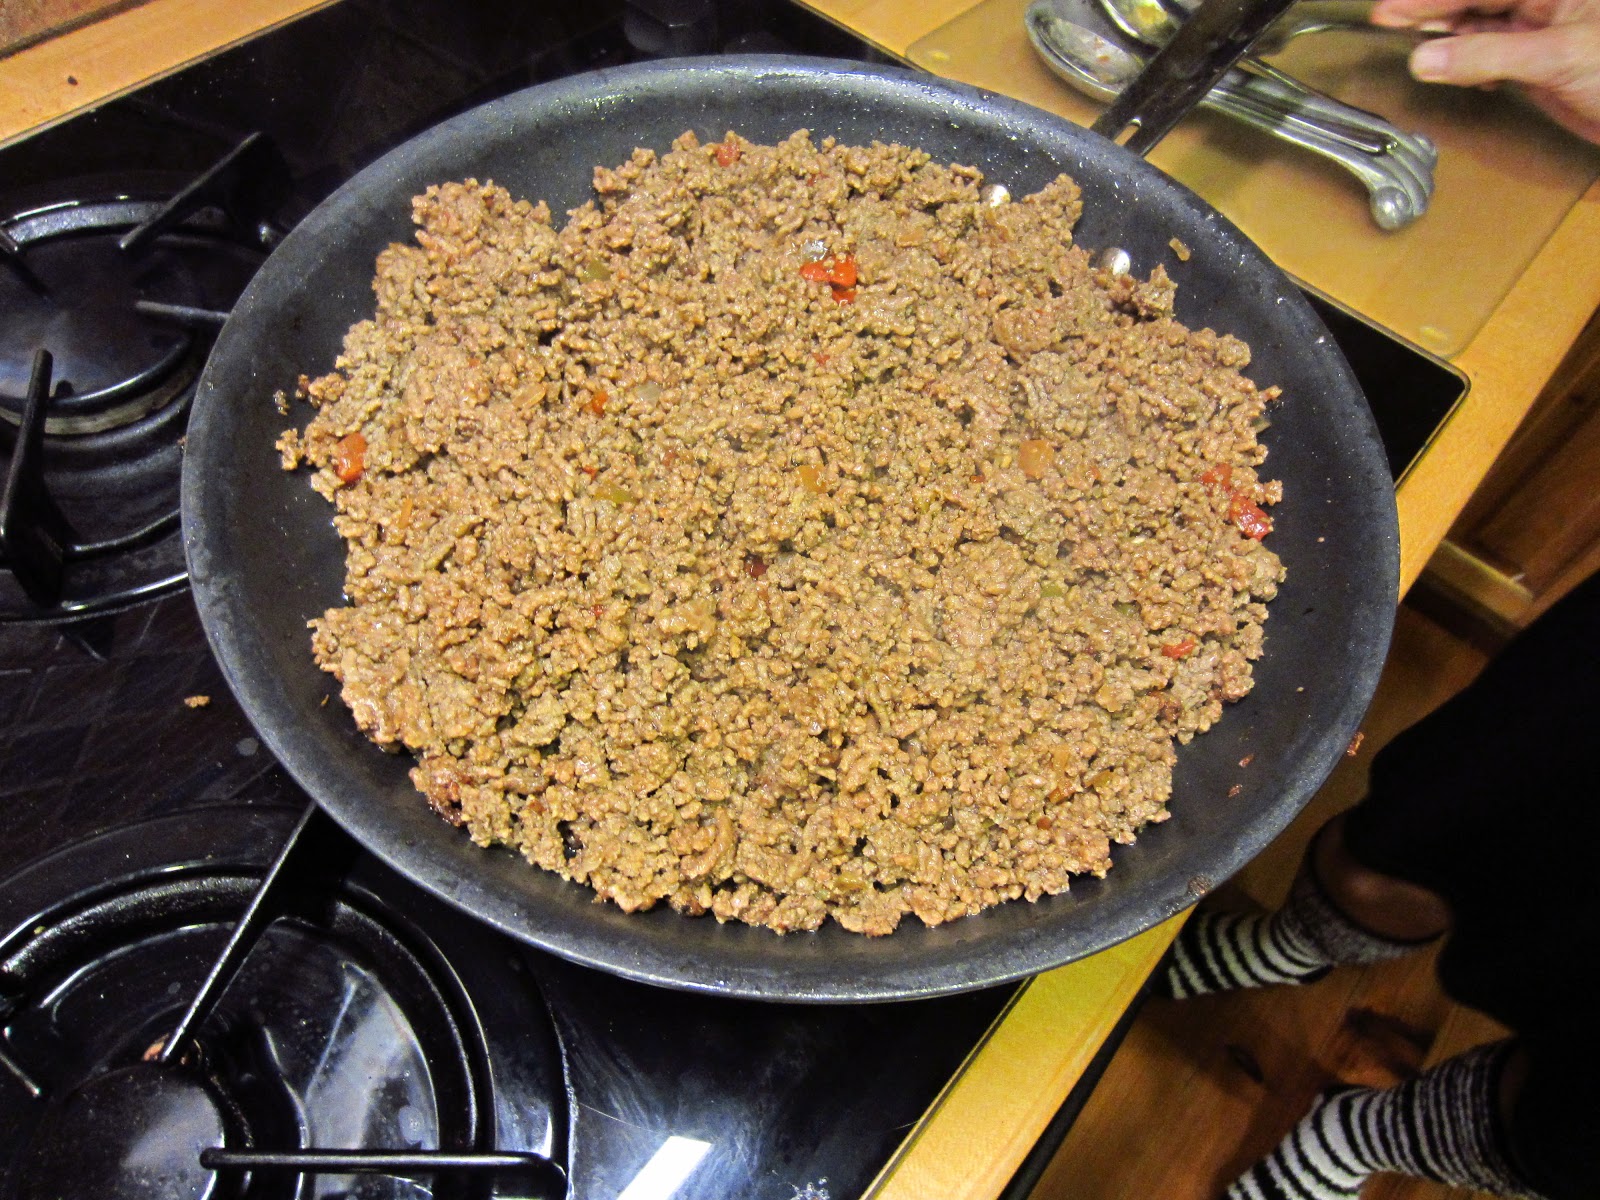
Picadillo....


Frijoles.....


Arroz sazon.....


Finished plate, with tequila and shot glass.....


There was Sierra Nevada Pale Ale and Hamm's, for political solidarity with the beer drinkers and voters of California and Minnesota. Hershey was declared the best dog on the estate, dinner was served, drinks were had, and the election results commenced. Everyone had predicted a squeaker, that the results weren't going to be known for weeks, and that there would be countless party challenges to the results. As soon as Chuck Todd announced that Romney had to take 5 of the next 6 battleground states, I knew it was done deal.

Thankfully it WAS a done deal by 10 pm, with Obama winning by a handsome margin. As soon as the victory was announced we put on Jimi Hendrix playing the "Star Spangled Banner" at mega-volume, so that the neighbors might have the opportunity too share in our glee (whether they wanted to or not).

Of course, Romney had to delay his concession speech to the last possible minute, to torture his supporters who were there at his headquarters as long as possible. Supposedly no concession speech was ready, which I find impossible to believe, even for that group of thugs.When the news was announced that as soon as Obama had enough votes to reach 270, even without the Ohio results, he would go ahead and give his victory speech, whether Romney has conceded or not, Romney suddenly decided that it was time. I thought he droned on a little long, but at least he was appropriately conciliatory, calling for us all to bond together to get something done.


Romney conceding, with my middle finger extended in foreground as a salute to his efforts to be our would-be overlord....


Our guy, victorious....


We stayed up until almost 1:30 watching the rest of the states trickle in, and applauding the victories of the women senators, which made getting up at 5am the next morning a little sketchy. The final numbers were what I'd call landslide territory, but I'm biased. At the least it was a good ass-whipping, and the haters and douchebags went down in flames.

Carl Rove looked like a jackass disputing Ohio results that all agreed were a loss for his team. Florida didn't count, and STILL hasn't submitted their final results, although Obama is in the lead. Sheldon Adelson wasted at least $60 million dollars on Romney (some say as much as $100 million). The Koch Brothers probably wasted  as much or more. All of the GOP pundits now decide that Romney was the wrong candidate, and kick him as he writhes. Throw in some Murdoch and Akin hating too, though the GOP were supporters up to the bitter end. The Dems got 2 more spots in the Senate, and picked up a few more in the House. The GOP, which invested so much time, money, and effort to castigate minorities, immigrants, women, and gays got defeated by them. Id call it a sweet victory. I even heard Texas called a future "swing state"!

Mick Vann © 

"Dangerous Grounds" Premier on Travel Channel

The main component of reality TV is drama, and Dangerous Grounds is loaded with edge of the seat excitement (although, in the back of your head, common sense dictates that they wouldn’t have the star of their new series killed off in the first episode). That said, we open with Todd Carmichael, with an obviously anxious newbie cameraman in tow, talking about “black gold”, the 60 billion dollar a year industry that is coffee, and how some of the world’s very best beans grow in some of the world’s worst and most dangerous places. He’s one of the coffee zealots that seeks out these rarefied, sustainable beans.


Carmichael and cameraman, with herd of Haitian kid

We are in Haiti, in search of high altitude Typica beans, the ancestors of the beans imported to Haiti from Africa in the 1700’s (see note below). Carmichael describes Haiti as being a place of category 5 (the worst on his scale) anarchy, with graft, lawlessness, police repression and bribery, corruption on a massive scale, murder, and just general cultural chaos. Add to that mix abject poverty, especially after the earthquake, which the country still reels from, and you have a potent mix.


After buying some crap beans in the market to try to figure out where he should be heading for the best beans, the purchase of which starts a near riot, he meets with the Haitian “Pope of Coffee”, who tells him: “You try to break the middlemen (those who profit obscenely from the poor coffee farmer’s efforts), you going to war.”


Carmichael buying crap beans in the market in Port au Prince


He stops on his journey up in the mountains, picking beans along the way, showing us why they are inferior. We hear about the vicious middlemen “coyote” buyers that sneak in from the Dominican Republic to buy beans, and about the President’s monopoly on claiming all of the best beans; neither of these groups want Todd buying beans, and the first few sellers he encounters are afraid to sell to him, for fear of reprisal, or because the crop is already promised.


As he heads out of the town run by the President’s men, the truck’s driveshaft breaks, and they are forced to hike back into the dangerous town to try to find a garage. He stumbles across the company of an old acquaintance coffee buyer from Port au Prince, who allows them to sleep in their office that night, and provides them a working truck the next morning.


As they climb higher darkness falls, and they are forced to sleep on the road (a dirt track really). He temporarily disables the truck’s engine so that it can’t be hotwired, and they sleep underneath so that they can roll out the side into the jungle in the middle of the night, should robbers happen upon them. Don’t forget that Carmichael is carrying bundles of currency to make a large cash purchase, and only an idiot thief would not recognize that fact.
 

From a mountain ridge he spots bananas growing across the steep valley, on the side of a tall peak. Bananas at this altitude mean only one thing: coffee beans. Bananas are grown as a companion crop: they provide shade and protection, and the banana’s root system helps break up the soil and keep it evenly moist for the coffee trees.


They work their way around the valley ridge and finally make contact with a farmer willing to sell directly to him, 23 bags of plump, ripe, high altitude, beyond-organic, hand-processed, sun-dried, sustainable typica beans from an ancient Yemeni strain, grown at 8500 feet. He breaks out his portable camp stove bean roaster (the size of a large potato), roasts the beans for 15 minutes, grinds them up, and brews a test batch of the beans, describing the taste as orgasmically good. He has to hide his glee at the discovery; to show his excitement jacks the price up accordingly.


Testing the beans


We go back to his processing facility in Philadelphia, where he roasts 3 million pounds of beans a year, and we follow the beans through the roasting process.


Sure I like coffee, but I’m nowhere near this obsessed about it. I’ll drink Folger’s if that’s all that’s there. I sure wouldn’t risk life and limb for a prime bean, no matter how fantastic it was. But I must say that after the first episode, I’m definitely hooked, adding Dangerous Grounds into my TV watching rotation. And I’m looking forward to the slew of foodie obsession shows that are surely soon to follow.


Travel Channel’s Dangerous Grounds regular time slot is Tuesdays at 8pm CST

 La Comombe Torrefaction website: http://lacolombe.com/            

Note: Typica beans originated in Yemen, and were transported by the Dutch to Malabar, India, and later on, to Indonesia. The bean was later taken to the French colony in Martinique, and from there to French outposts in Haiti. Typica beans are considered the genetic parents of new varietals such as South America’s Criollo, Central America’s Arabigo, Hawaii’s Kona, Mexico’s Pluma Hidalgo, Sumatra’s Garundang, Jamaica’s Blue Mountain, Brazil’s San Bernado and San Ramon, and Kents & Chickumalgu from India; heady company indeed.


Mick Vann ©